NGIAB Data Visualizer
-
Build using the Tethys Platform.
-
Geospatial and time series visualization of the Catchments and Nexus Points
-
Outputs of different model runs can be visualized by the user mounting the outputs of the NextGen in a box in the
app_workspacesof the application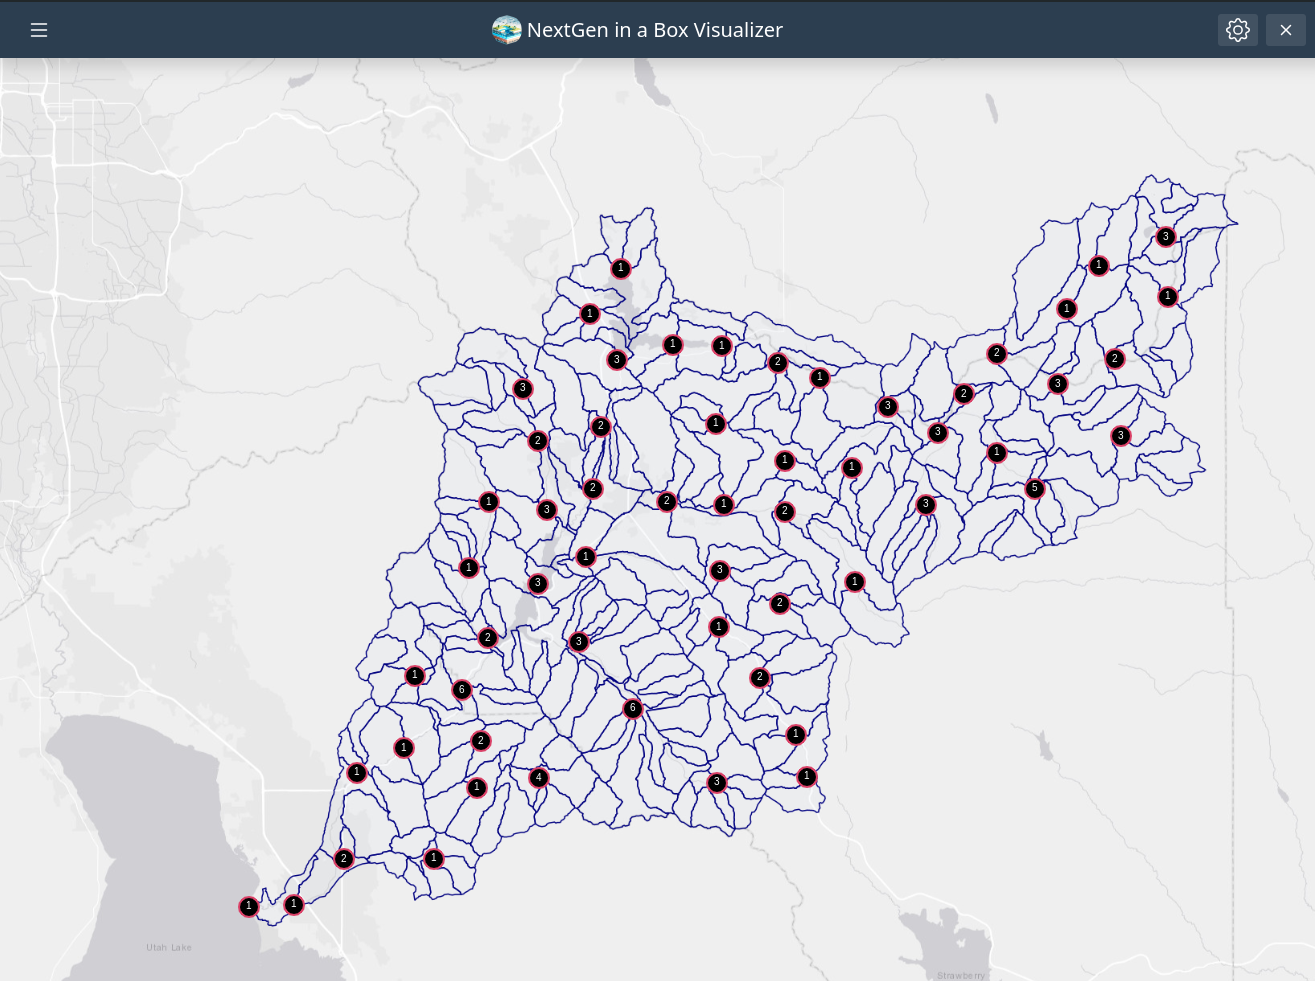
Visualization
-
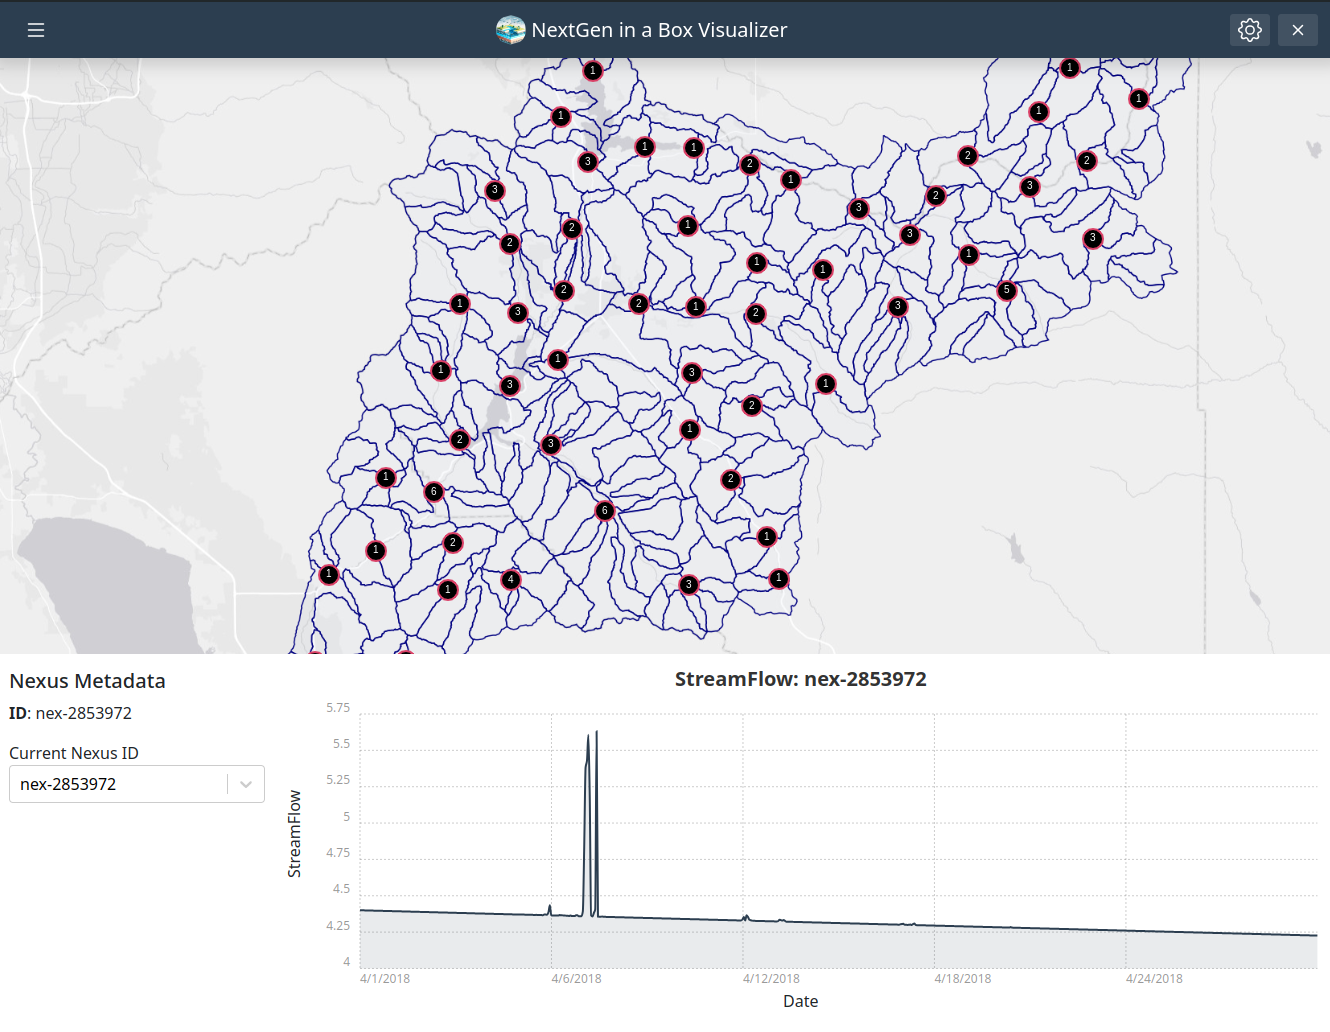
Catchments can be visualized by selecting catchments in the map, or using the custom dropdown to look for a specific catchment ID. In addition, variable time series can be visualized for each catchment using the variable dropdown menu.
-
The Catchment layer is prepared into a
shapefileand published to a local instance of GeoServer in order to allow catchment layers to be accessed usingWMS services. The
-
Nexus can be selected in the map. The different nexus points are clustered in order to allow Nexus layers containing thousands of nexus points. The nexus points can also be accessed using custom dropdown to look for a specific nexus ID
Running the Application
Running it through the NGIABCloud Repository
It can be run through the guide.sh. Once it has has finished running, you will be be prompted to use NGIAB-Visualizer app for visualization. The application will mount the output of the model.
It can be run through the viewOnTethys.sh. It will prompt the user for the data folder they would like to use, and it will mount such directory top the app workspace:
Running it through the guide.sh or viewOnTethys.sh does the following:
- Start NGIAB client app and GeoServer containers
- Prepare the catchments by publishing a shapefile store, that can be accessed by WMS service
- Make a nexus.geojson (if none provided)
- Copy the nexus.geojson to the config folder
- Open a tab with the NGIAB client app in your current browser.
Running it locally
Requirements
- Docker
- miniconda3
Steps
- Install the tethys platform, you can actually use the
micro-tethysversion.
conda create -n tethys -c tethysplatform -c conda-forge micro-tethys-platform
- Activate the tethys environment
conda activate tethys
- Generate the portal config file
tethys gen portal_config
- configure database. In this case sqlite
tethys db configure
- Install the application from source code by running the following command
tethys install -d
-
Under the path
tethysapp/ngiab/workspaces/app_workspaceput the resource folder that you use to runNGIAB -
Spin an instance of GeoServer using the following command:
#this will pull the image, use default values, and when prompt to mount data directory, put a valid path
tethys docker init -c geoserver

#this will start the container
tethys docker start  -c geoserver
- Start the dev server
tethys manage start
- to access the app, you might use the following
- user: admin
- password: pass